TL;DR: I probably never would have done this in retrospect, but I am happy with the result. I was scratching my head as to why every quote I got to remove this paint was $2500+. Now I know why. This isn’t just a chemistry test, it’s also a very time consuming, raw physical feat and a test of emotional stability.
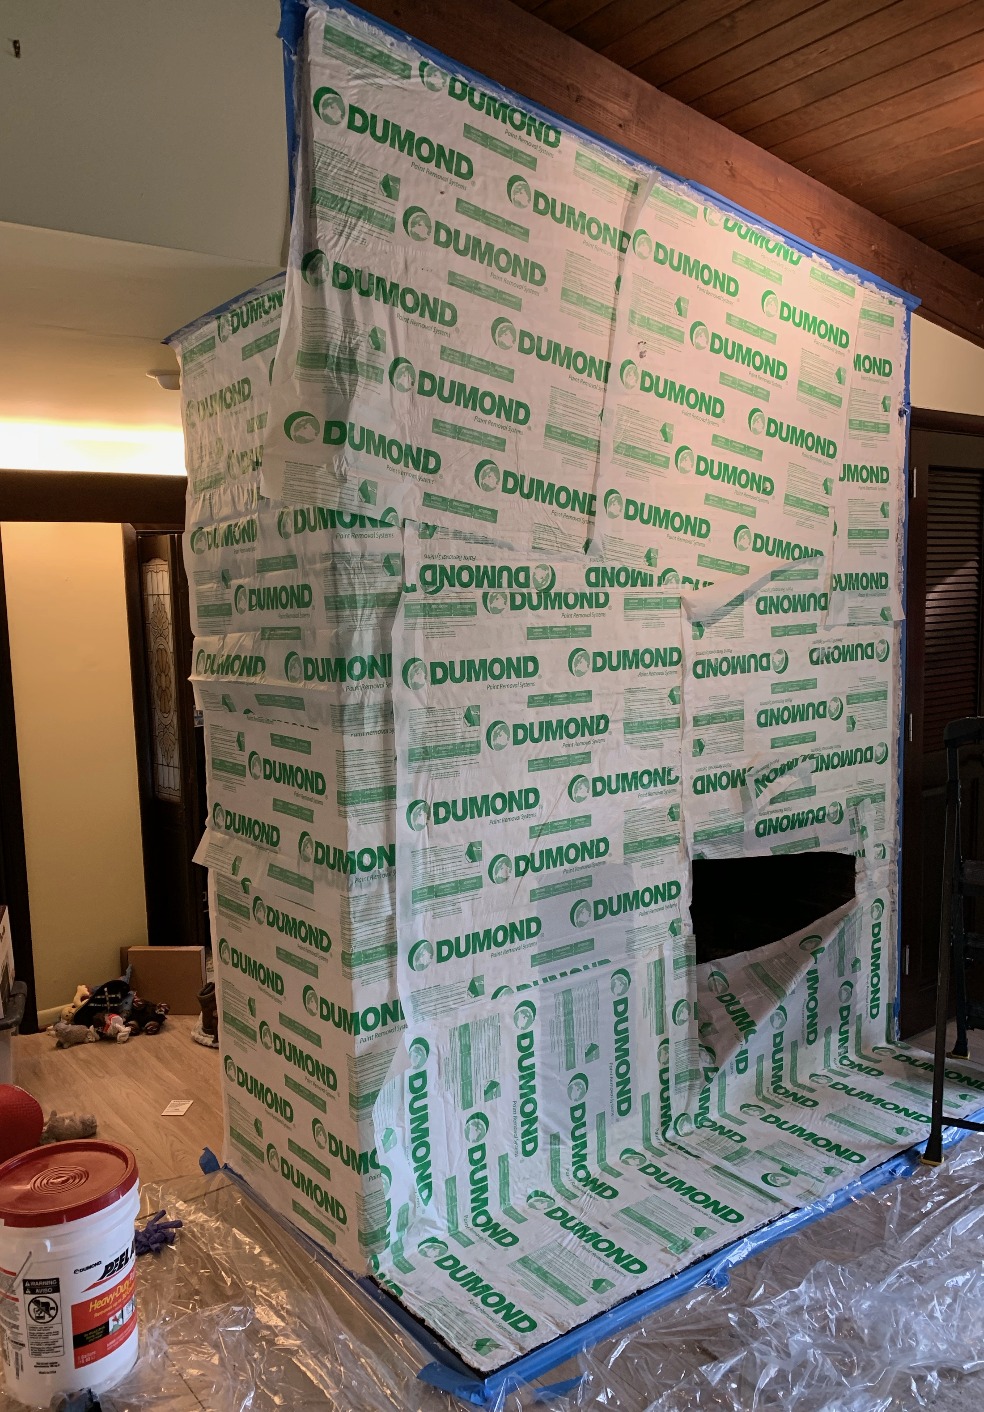
To start, I went with a product called Peel Away https://www.dumondchemicals.com/home-peel-away-1.html because it does not produce any toxic fumes (its essentially a paste that, in theory, fuses with the paint layer over the course of 24 hours and can be cleanly “peeled away” with the included wax paper squares). It’s very expensive ($180), but the YouTube videos I watched seemed to make it look like a breeze.

Caution: Run far away from this product if (1) the target paint is latex based or (2) the target surface is noisy like brick. This stuff is the devil – it has a pH of like 13 which is highly caustic and begins burning exposed skin almost immediately. Best of all it did almost nothing to remove the paint after 24 hours:
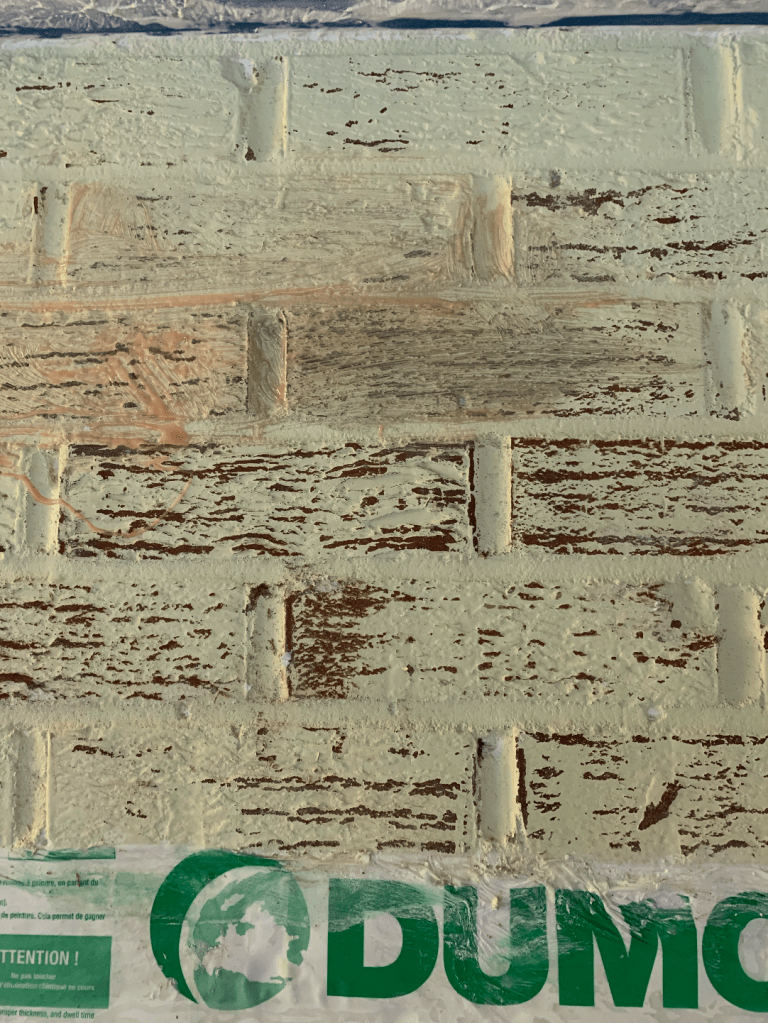
But wait, theres more! As soon as you expose this chemical to the air by removing the wax paper, it begins to dry. You cannot let it dry as it is almost impossible to remove when dry. Then you have the paint you didn’t remove covered with a highly caustic alkaline devil crust. We had to race to remove this paste from every nook and cranny in the molding and brick first with scrapers, then wire brushes and then water. This took forever. You get tired and frustrated, and then sloppy. The paste gets everywhere. It eats the floor finish just fine so you should be suited up like Dexter. Smells terrible. The best part of all is – the only way to reconstitute the chemical if it dries is to apply more of it.
After 48 hours we were back to here:
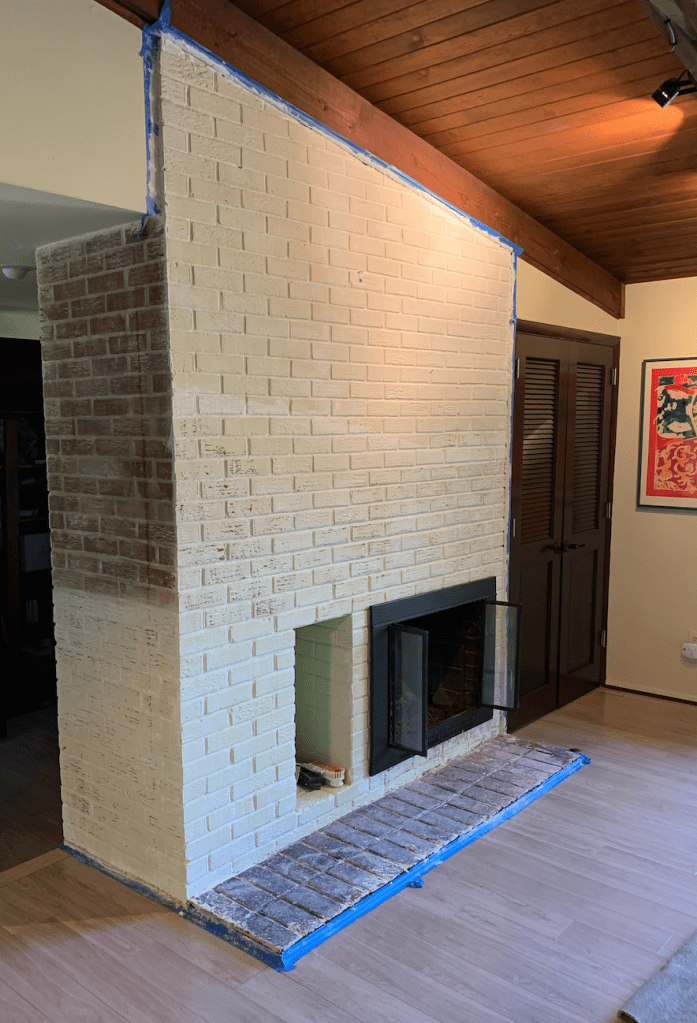
I picked up another chemical on a whim called “Citristrip Gel” which was responsible for the small portion of exposed brick you see there. But at this point, following the experience with Peel Away, we were ready to call it off, paint the whole chimney white and never speak of this again. But this weekend we foolishly got a second wind:
If you want to do this, this is the process we’d recommend:
Before starting, find a podcast or something that is deeply engaging and at least several hours in length. Doing so will preserve your sanity. https://wondery.com/shows/dr-death/ – this was unreal.
1) Apply Citristrip Gel in a thick coating on the exposed paint, wait 2 hours before you touch it at all. Re-coat the top to keep it relatively moist, you don’t want it completely dry.
2) You also don’t want it completely wet. As the chemical dries it consolidates with the paint and is easier to remove. Do a test scrape on a flat brick and see if its peeling in one piece, this is the go signal
3) Scrape faces of bricks and discard (the paint ends up coming off in strips)
4) Wire brush the grout and brick faces (this takes a lot of physical force, just FYI)
5) Wash the brick faces with a sponge with soap and hot water + detergent
As of this morning this is the state of the chimney:
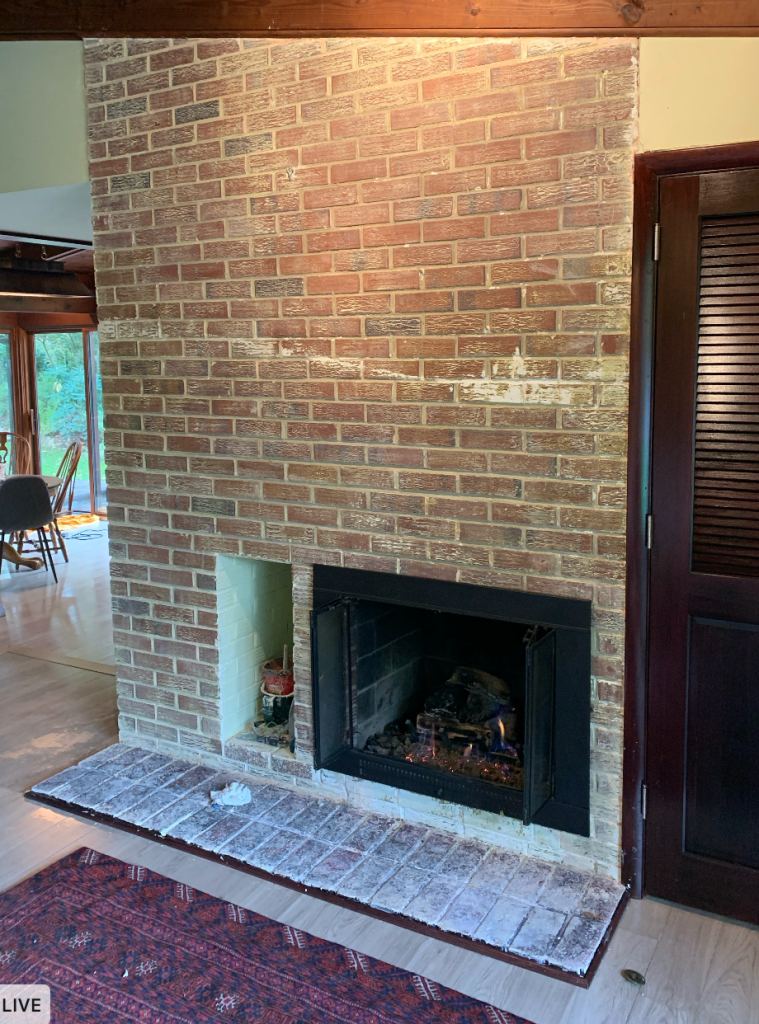
You see that white strip? Dried Peel Away. We have to go back and spot edit that. Also needs a once over with something stronger like mineral spirits to get the bricks completely clean. We’re gonna paint the floor bricks because this project is over.

Leave a comment